
Need a VPN for Mac?
Get ExpressVPN Now
Love ExpressVPN? Want a free month?
Refer a Friend NowThis tutorial will show you how to set up the ExpressVPN Mac app.
The app requires 10.13 (High Sierra), 10.14 (Mojave), 10.15 (Catalina), 11 (Big Sur), 12 (Monterey), 13 (Ventura), or 14 (Sonoma) to use. To find out which macOS version you are using, refer to this guide.
Jump to…
Download the app
Get your activation code
Install the app
Set up ExpressVPN
Connect to a VPN server location
Disconnect from the VPN server location
Choose a different VPN server location
Switch to a different VPN protocol
Block ads, trackers, and harmful sites
How to add shortcuts to the ExpressVPN app
Launch and connect ExpressVPN on startup
Use the VPN Speed Test
Use Split Tunneling
Optional: Use the Menu Bar
Use the ExpressVPN browser extension
Access printer and shared folders on local area network
Change languages in the ExpressVPN Mac app
Uninstall the app
Download the app
Go to the ExpressVPN account dashboard. If prompted, enter your ExpressVPN credentials and click Sign In.
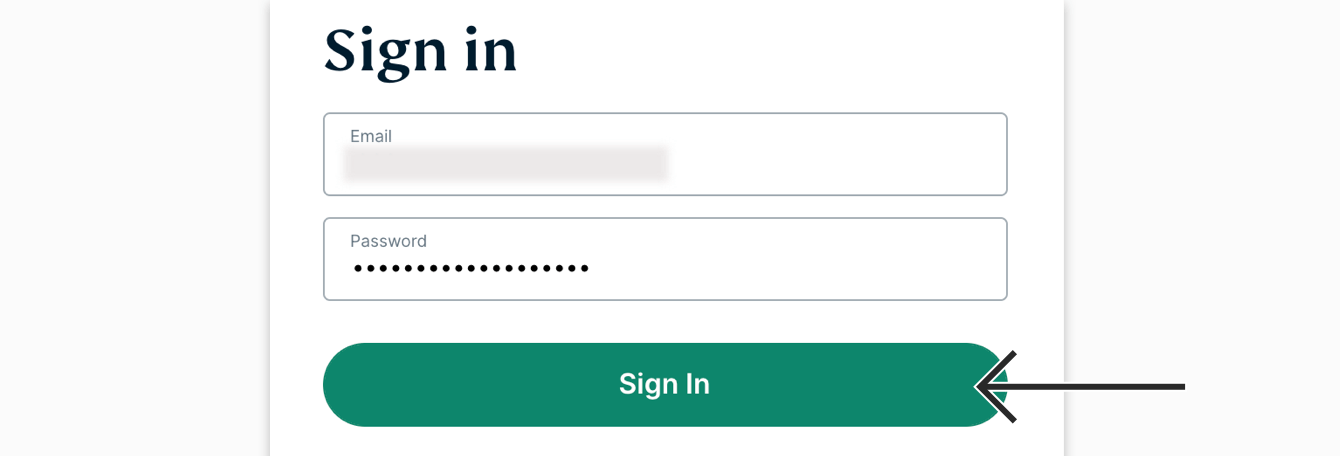
Enter the verification code that is sent to your email.
Click Download for Mac.
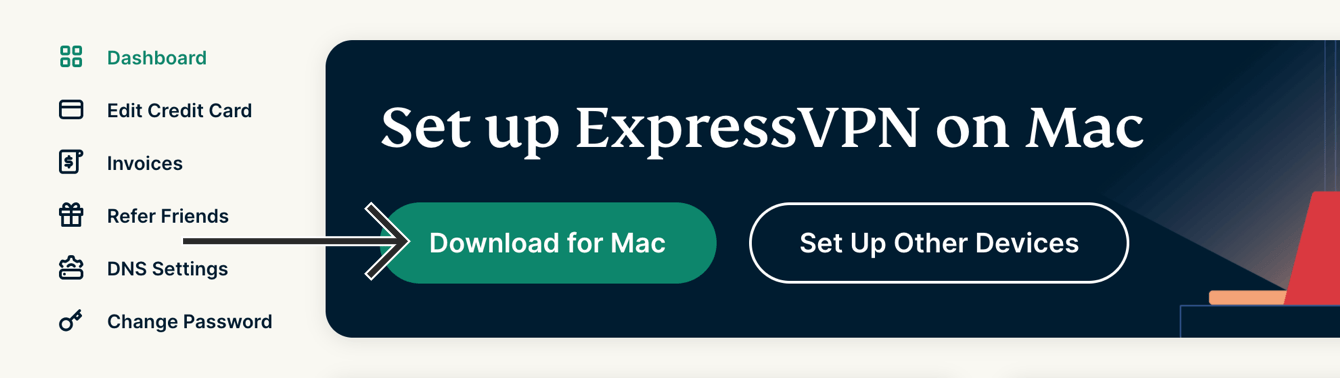
Keep this browser window open. You will need the activation code for the setup later.
Need help? Contact the ExpressVPN Support Team for immediate assistance.
Get your activation code
To use ExpressVPN on your Mac computer, you will need your activation code.
Click ![]()
![]() to copy it to your clipboard. You will be asked to provide it later.
to copy it to your clipboard. You will be asked to provide it later.

Need help? Contact the ExpressVPN Support Team for immediate assistance.
Install the app
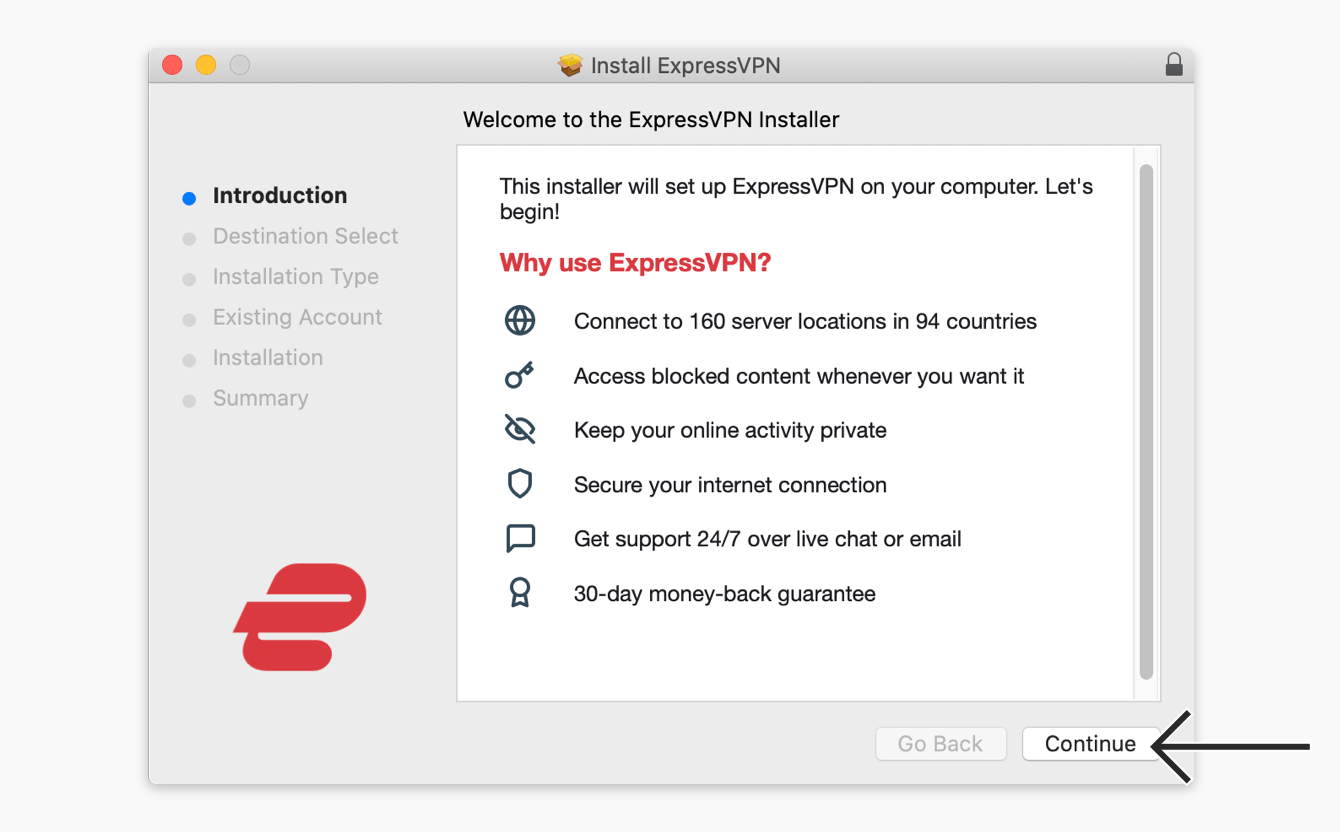
Locate the downloaded file on your computer and open it. A window will pop up, saying, “This package will run a program to determine if the software can be installed.” Click Continue, and keep clicking Continue until you reach the “Installation Type” screen.
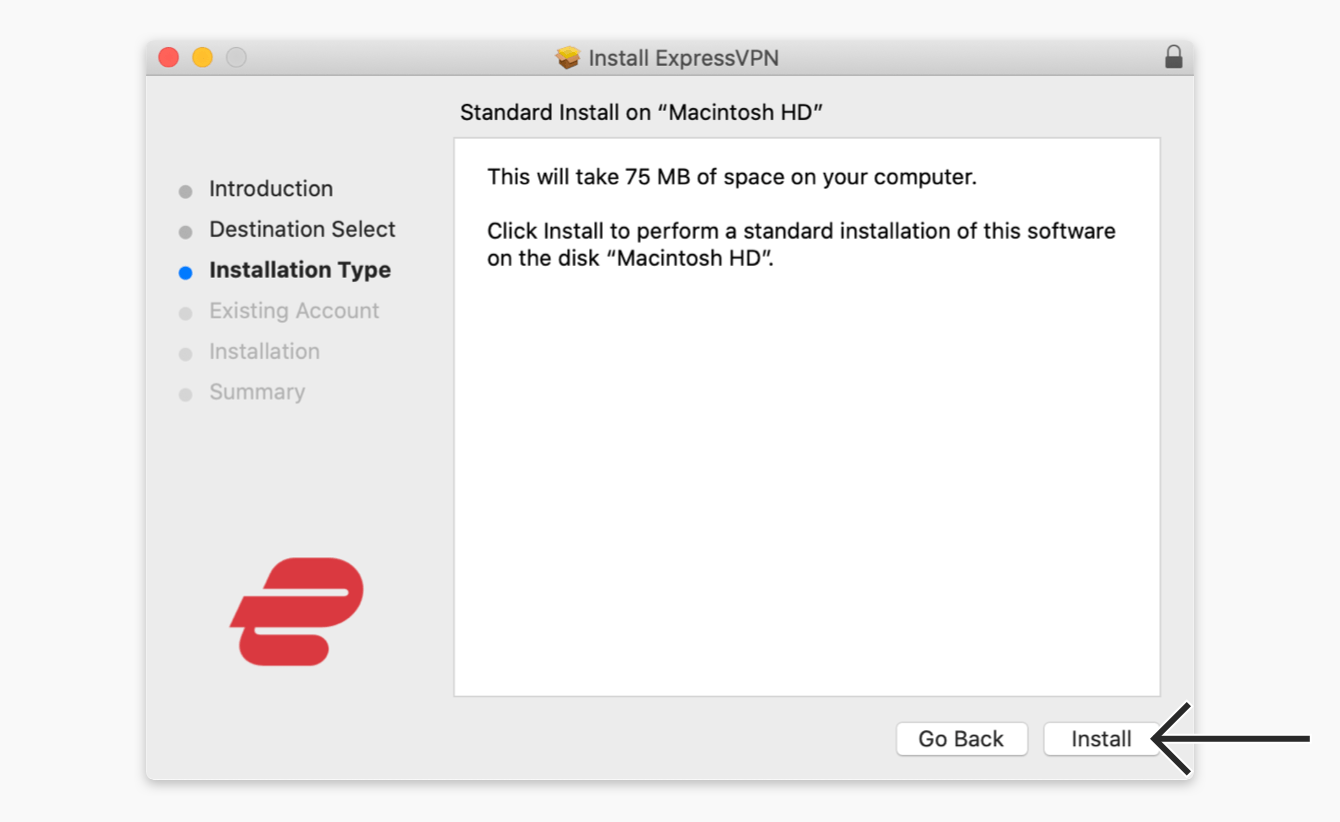
After selecting the installation destination, click Install.
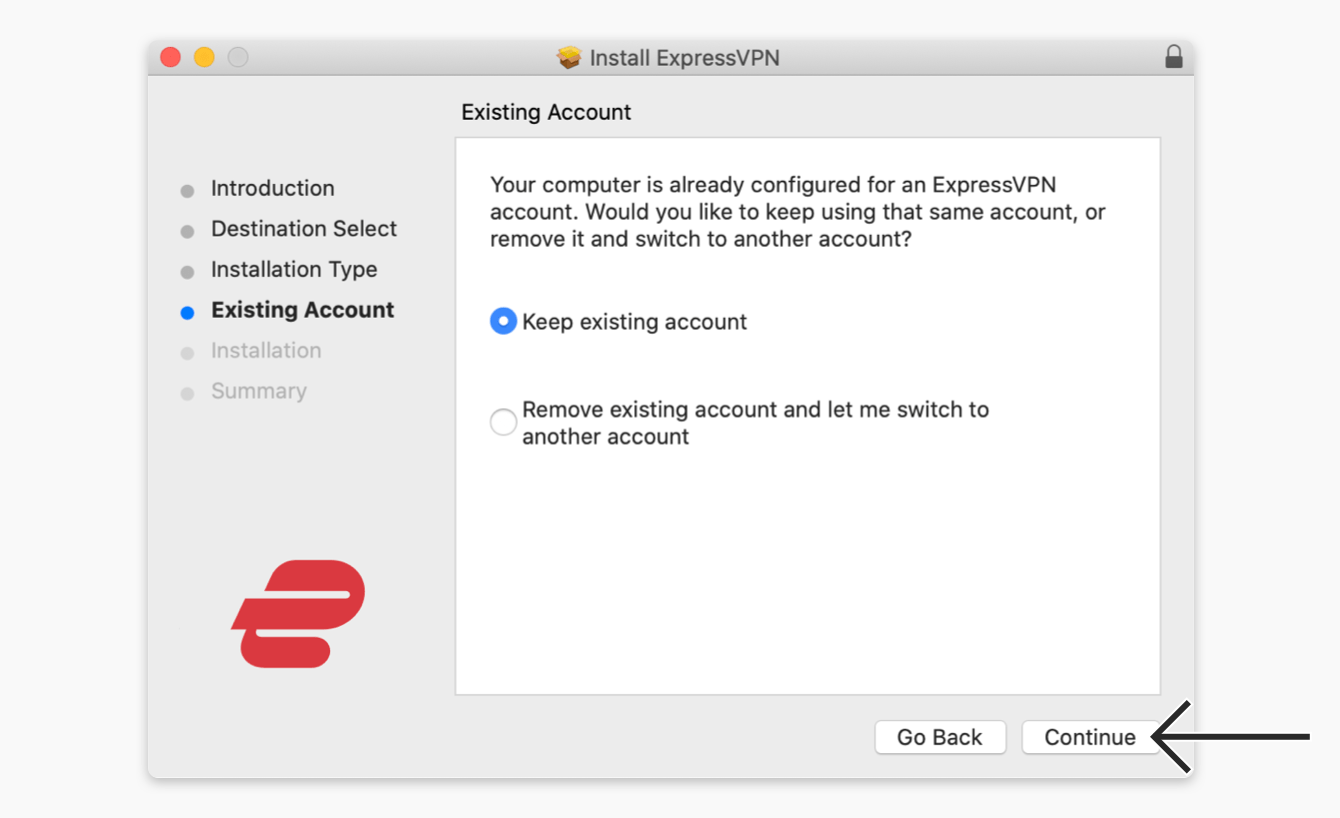
You will see the following window ONLY if you have installed ExpressVPN on your Mac before. If you do not see this screen, skip ahead.
- Select Keep existing account if you are reinstalling ExpressVPN with the same activation code as before.
- Select Remove existing account and let me switch to another account if you are using a new activation code.
Select your preference and click Continue.
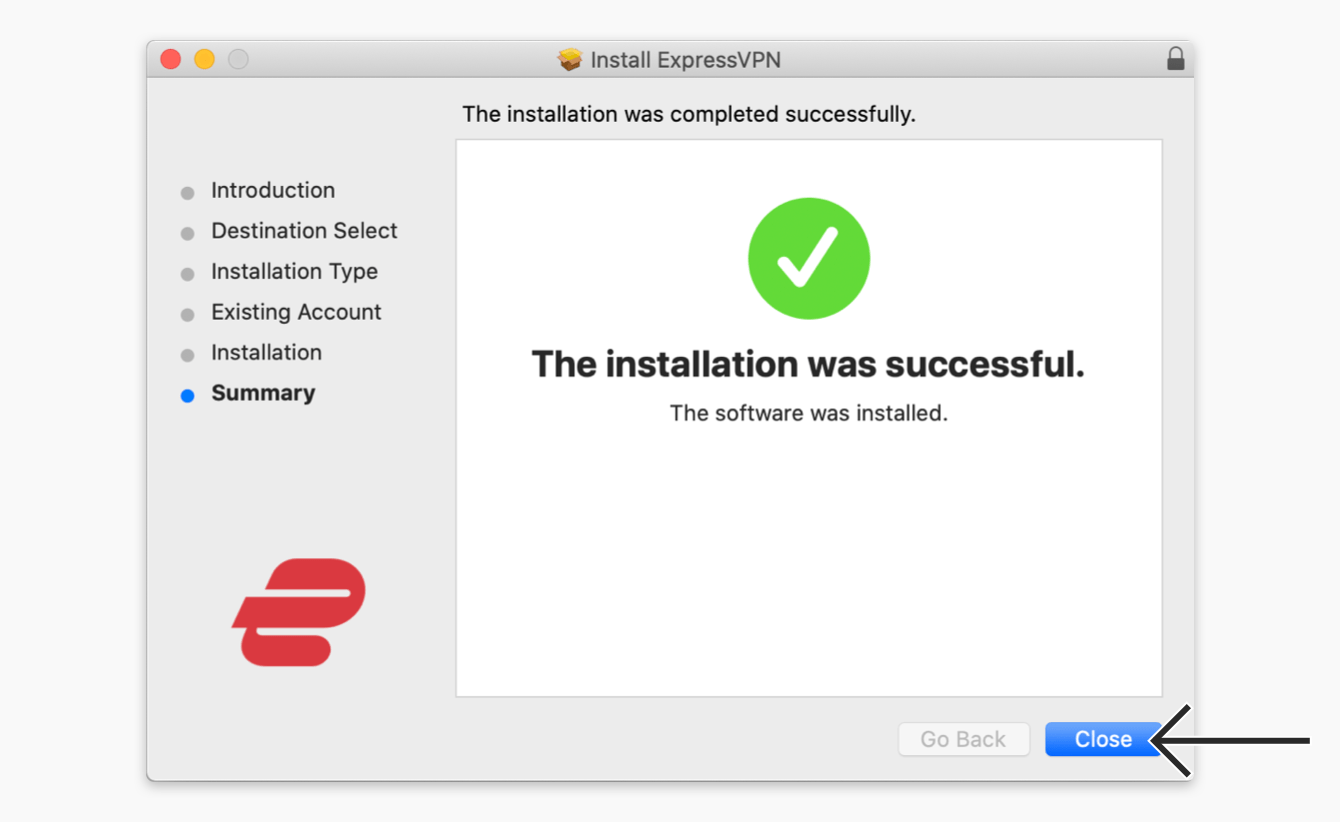
Wait for the installation to complete, then click Close.
Need help? Contact the ExpressVPN Support Team for immediate assistance.
Set up ExpressVPN
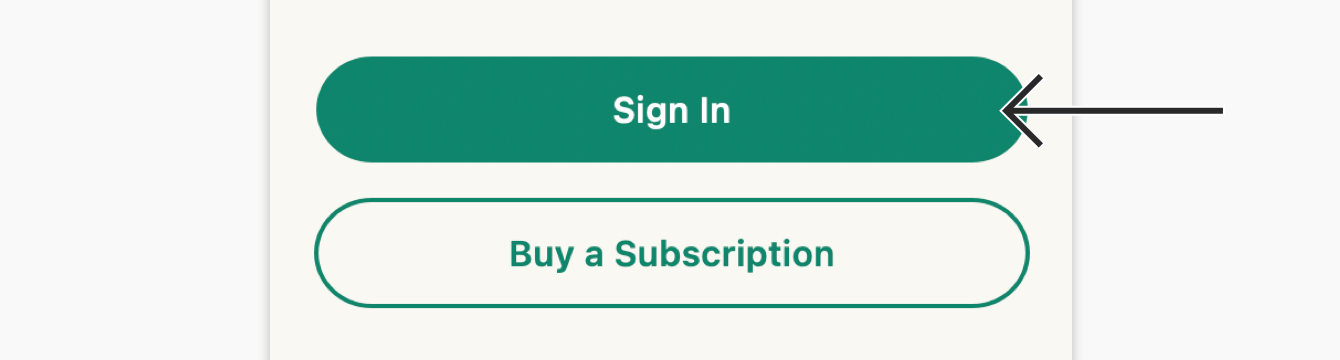
After the installation is complete, the ExpressVPN app will open automatically. Click Sign In.
Enter your activation code. This is the code you copied to your clipboard earlier. You can paste it by pressing Command + V, or right-clicking the rectangular field and clicking Paste. Then click Sign In.

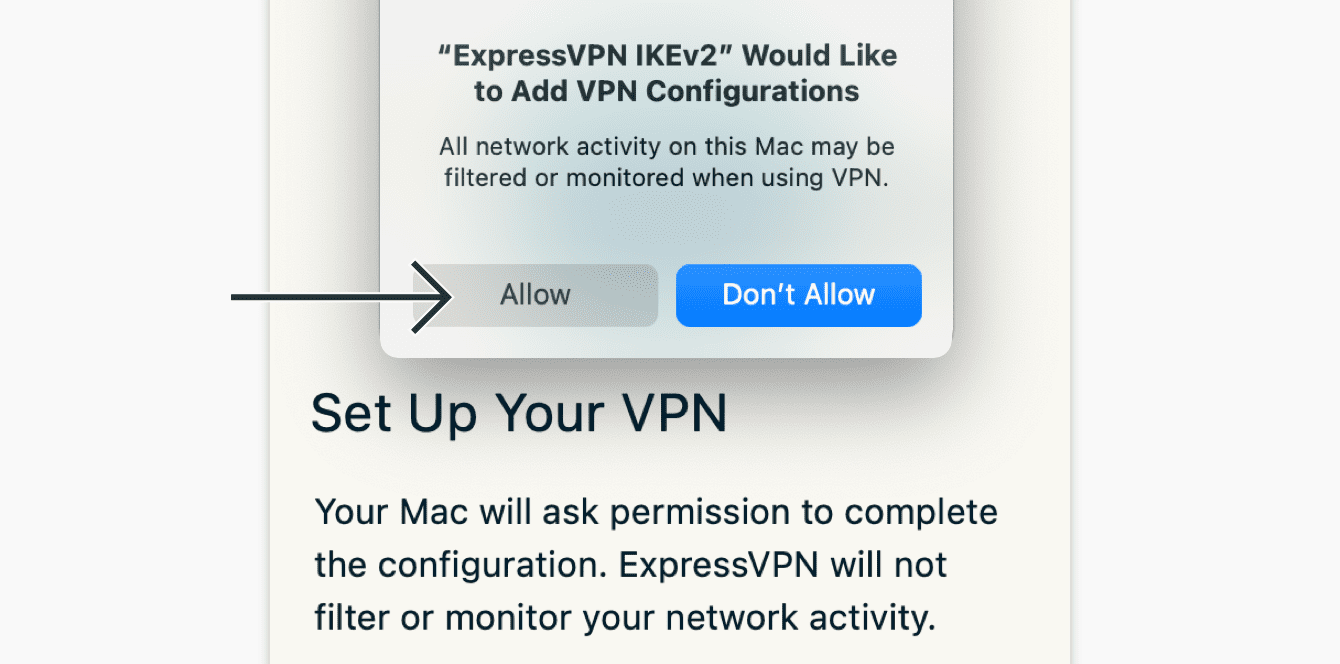
If you are prompted to allow ExpressVPN IKEv2 to be added on our VPN configurations, click Allow to continue.
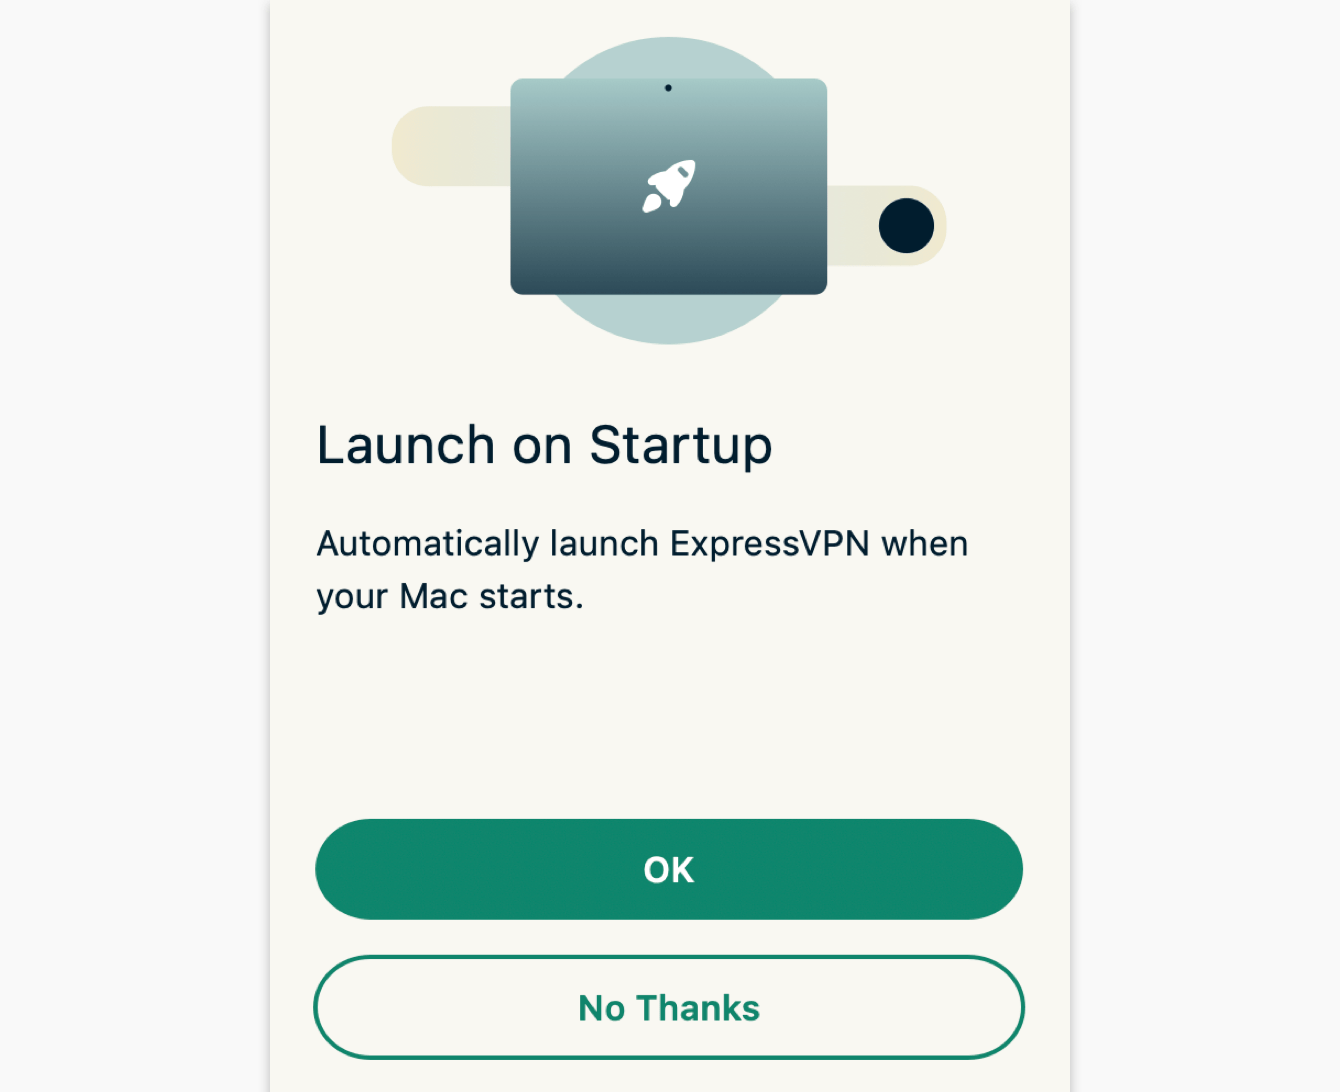
You will be asked whether you want ExpressVPN to launch on startup. Select your preference to continue.
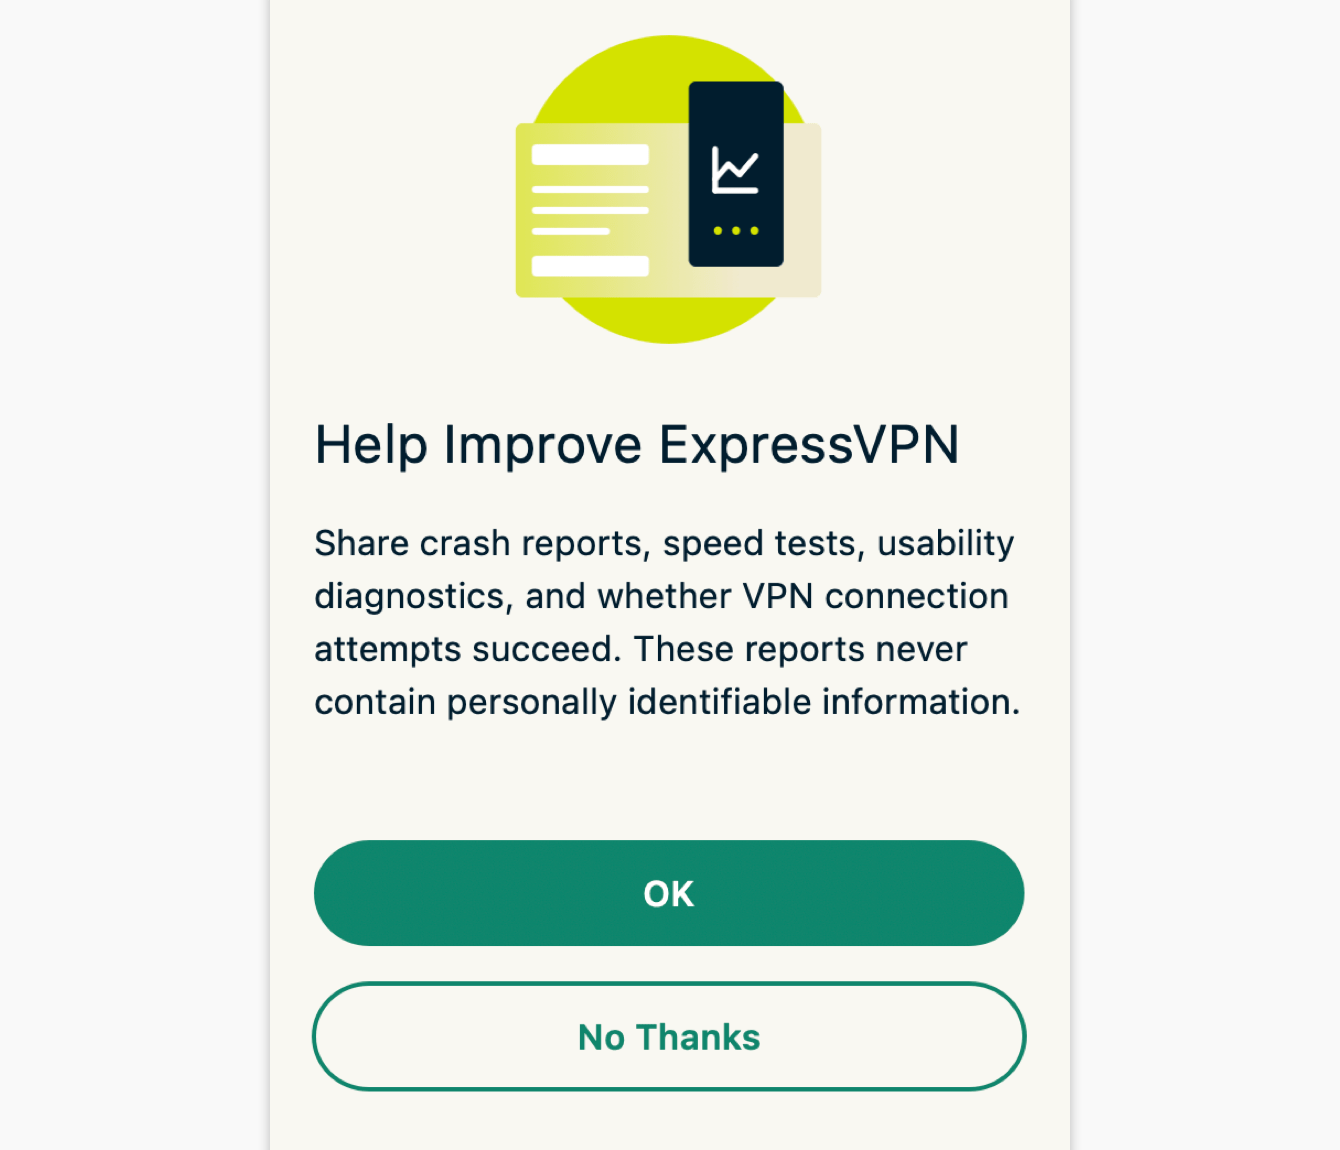
Finally, you will be asked whether you want to share anonymous diagnostics with ExpressVPN. This helps ExpressVPN continually improve its products and services. Select your preference and continue.
Congratulations! You are now ready to access our many VPN server locations.
Need help? Contact the ExpressVPN Support Team for immediate assistance.
Connect to a VPN server location
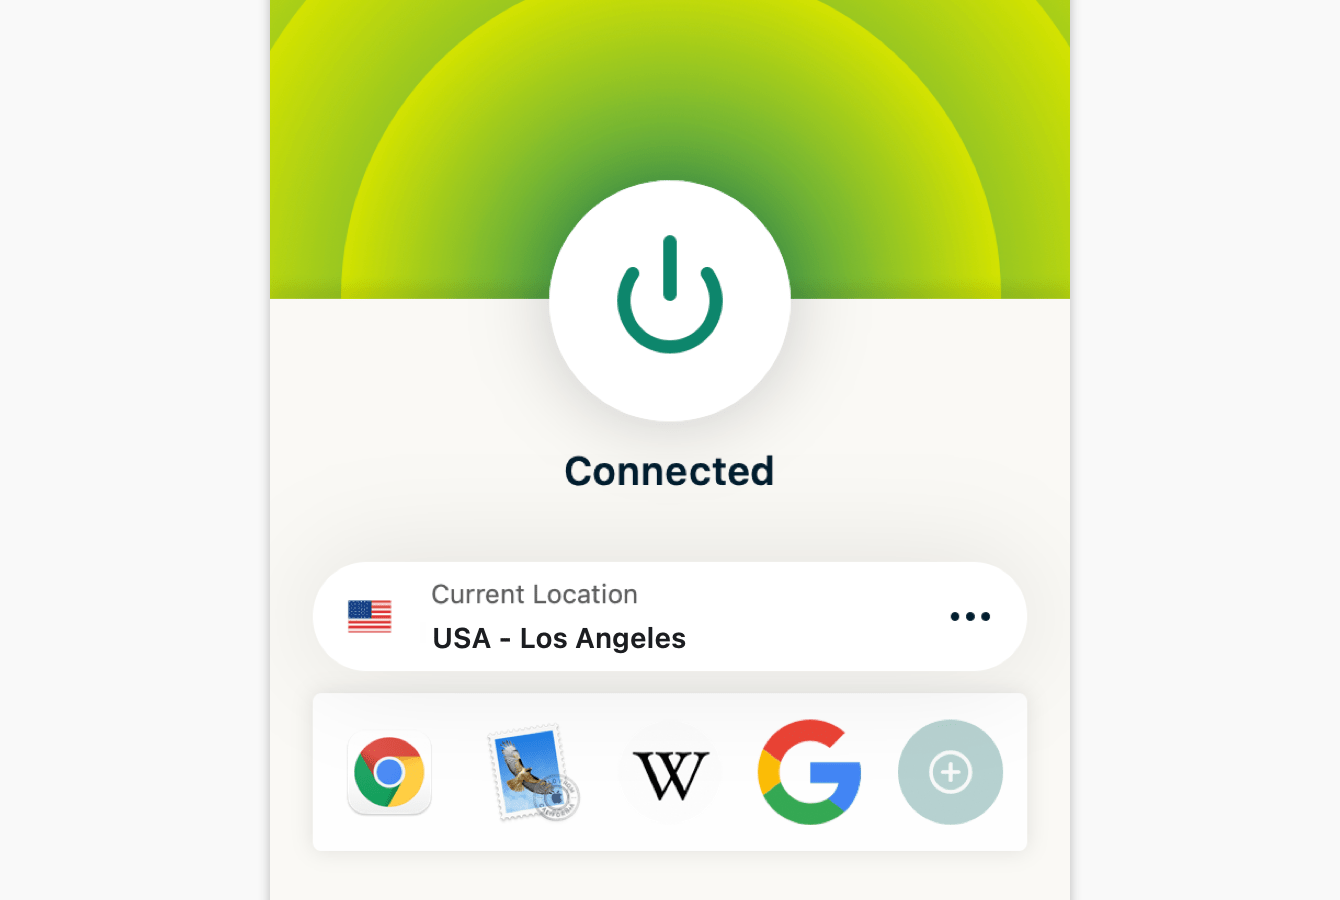
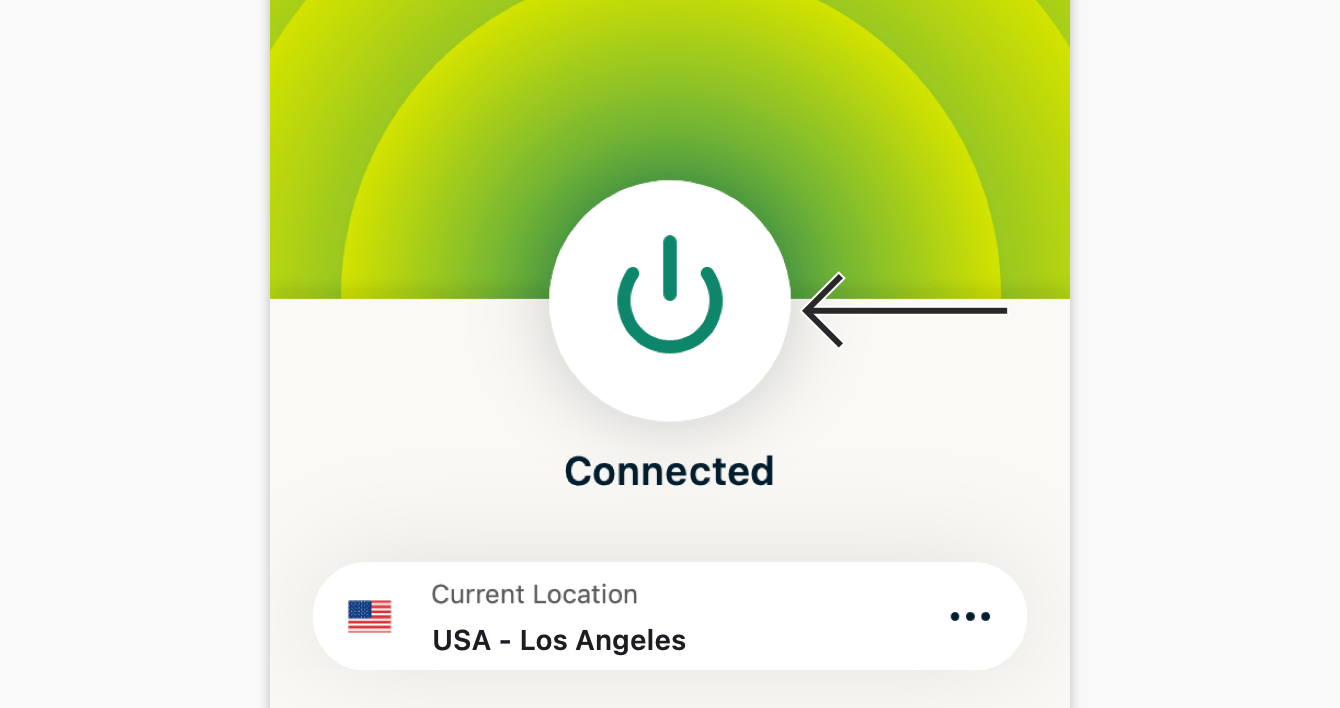
To connect to a VPN server location, click ![]()
![]() . By default, ExpressVPN will suggest the location that provides the optimal experience for you, called Smart Location.
. By default, ExpressVPN will suggest the location that provides the optimal experience for you, called Smart Location.

Once the app says “Connected,” you can begin surfing with freedom and security!
Underneath your current location, you will see a list of app shortcuts. Shortcuts allow you to launch apps and sites (such as for video streaming) directly from ExpressVPN right after you are connected.
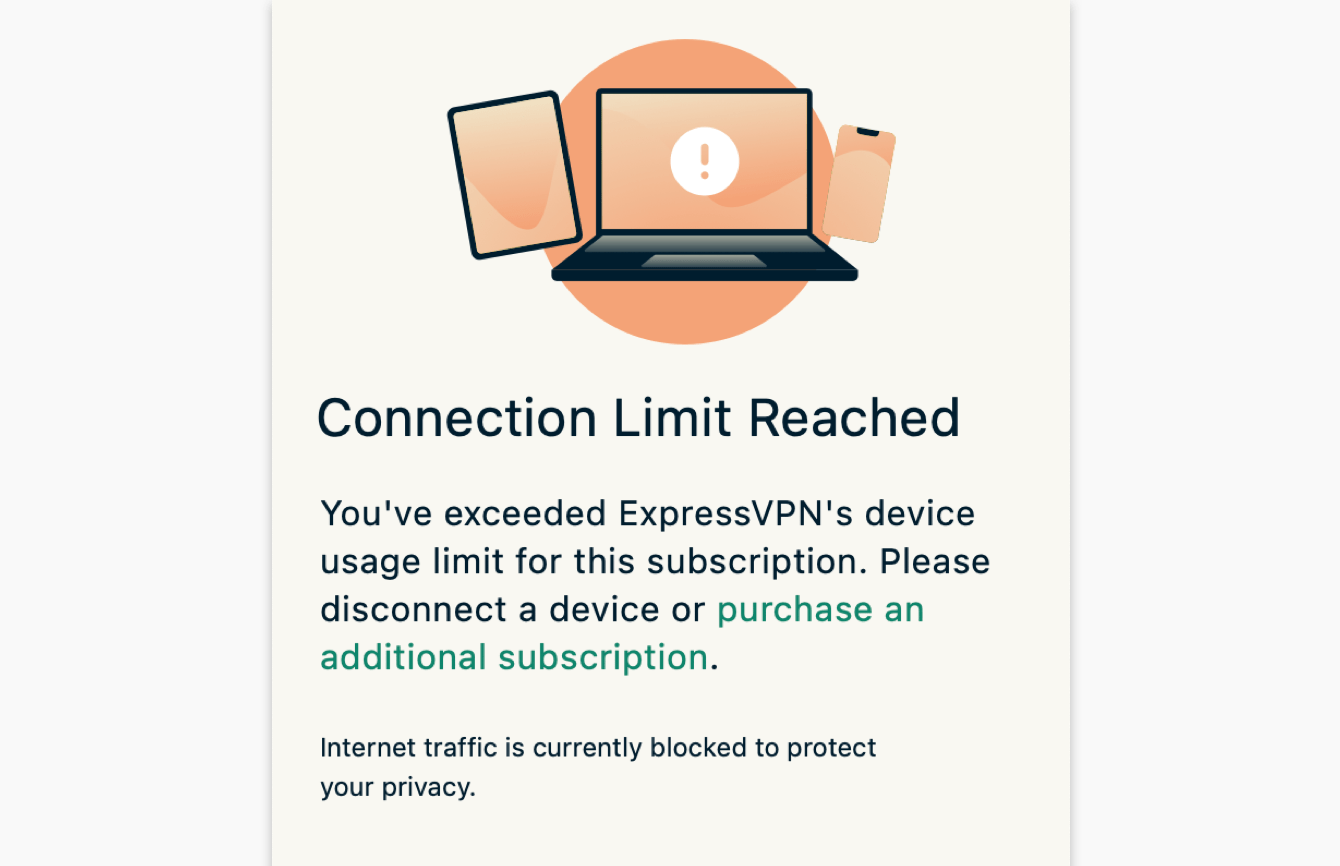
Note: With a single ExpressVPN subscription, you can connect to the VPN on up to eight different devices at the same time, regardless of platform. If you try to connect more than eight devices at once, you will see this screen:
Need help? Contact the ExpressVPN Support Team for immediate assistance.
Disconnect from the VPN server location
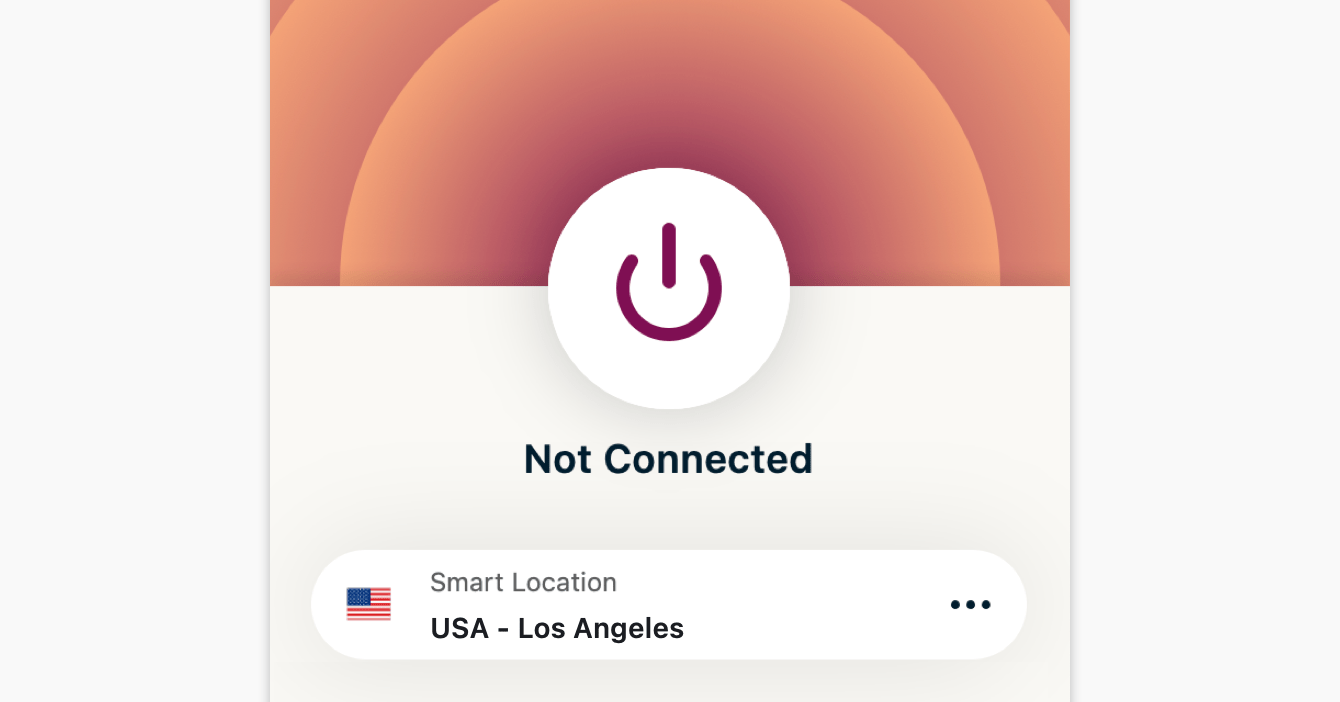
To disconnect from the VPN server location, click ![]()
![]() .
.
You will know you are disconnected when the screen says, “Not connected.”
Need help? Contact the ExpressVPN Support Team for immediate assistance.
Choose a different VPN server location
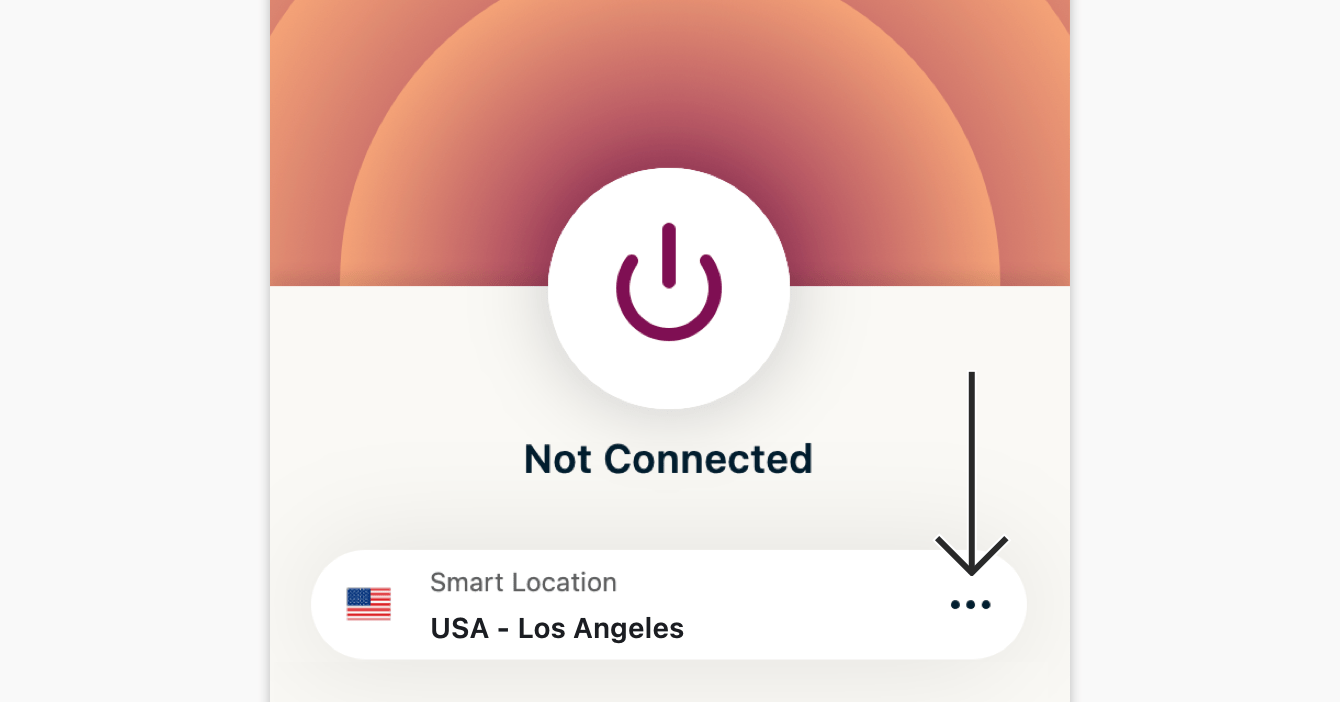
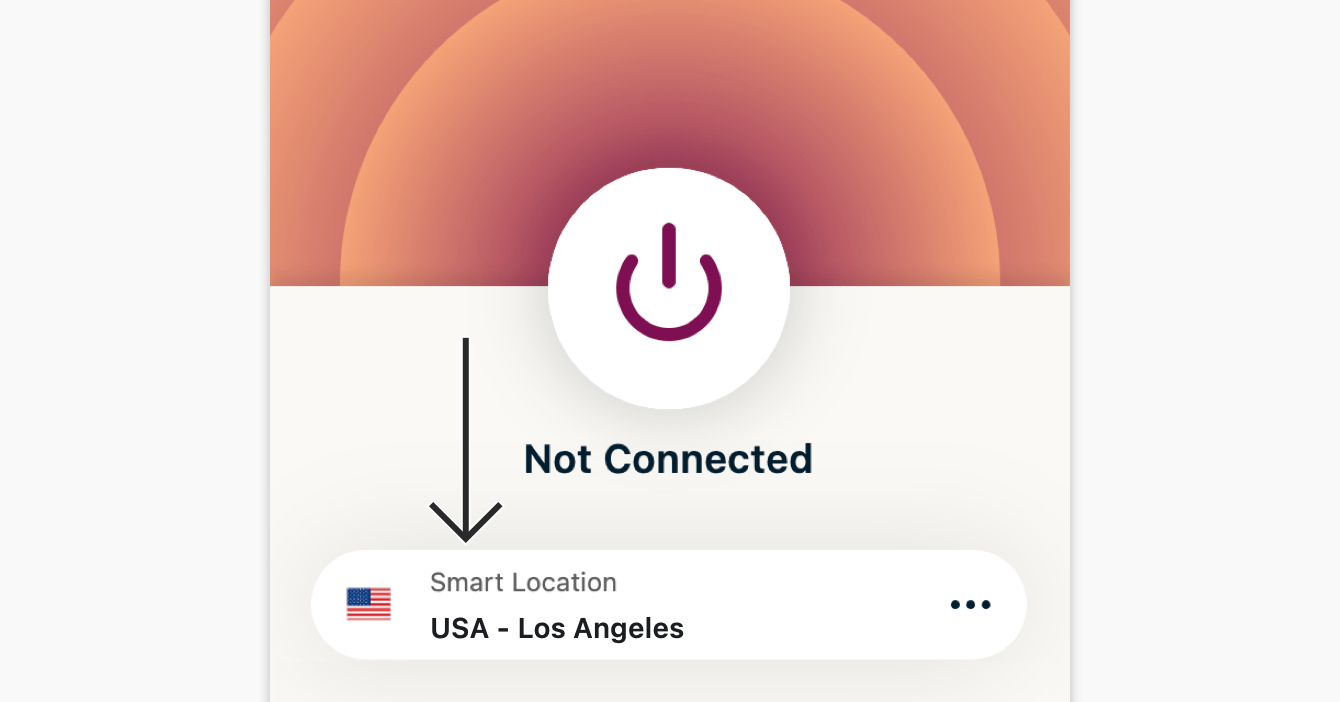
To choose a different VPN server location, click ![]()
![]() to access the list of VPN locations.
to access the list of VPN locations.
To connect to a server location, double-click the location.
The list of VPN locations features three tabs: Recommended, All, and Recent.
The Recommended tab shows you ExpressVPN’s top picks for you to connect to.

The All tab lists the VPN server locations by region. You can expand and collapse the lists by clicking ![]()
![]() and
and ![]() .
.

The Recent tab has two sections. Recently Connected shows the three most recent locations you connected to. Favorites shows the locations you have saved as a favorite by clicking ![]()
![]() next to the location name.
next to the location name.

You can also search for your desired server location by using the search bar. Inside the search bar, type the name of your desired server location and then double-click the server location in the search results to connect to it.

After disconnecting from a server location you selected, you can return to your Smart Location (the location recommended for optimal experience) by clicking Smart Location.
Need help? Contact the ExpressVPN Support Team for immediate assistance.
Switch to a different VPN protocol
VPN protocols are the methods by which your device connects to a VPN server. For the best experience, ExpressVPN recommends using the Automatic protocol option. This is selected by default and automatically picks the protocol most appropriate for your network.
In some cases, switching to a different protocol may help you achieve faster connection speeds.
To switch to a different protocol:
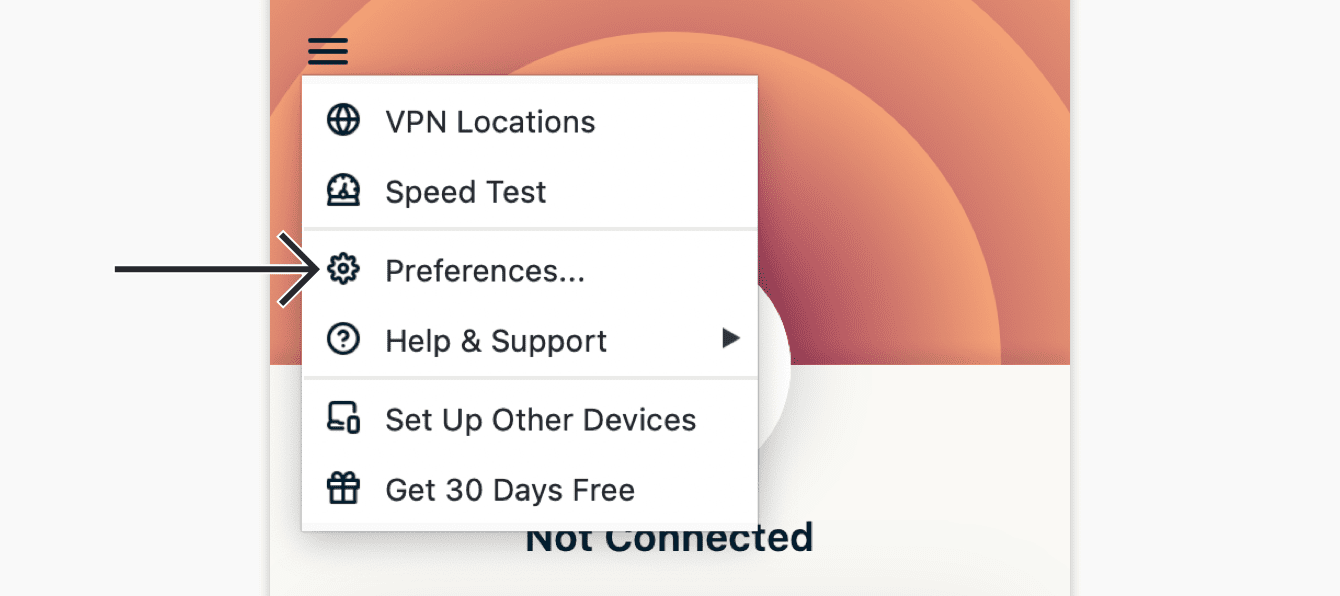
Click ![]()
![]() , then click Preferences…
, then click Preferences…
Click the Protocol tab. Select the protocol you want to use.

Need help? Contact the ExpressVPN Support Team for immediate assistance.
Block ads, trackers, and harmful sites
Customize your online experience and take back control over what companies know about you. You can block ads, trackers, malicious sites, and adult content in the ExpressVPN app with just a few clicks.
A lot of the apps and websites you visit keep a record of and share your activity with third-party companies, including trackers, scammers, and malware sites. This information is used to serve you more targeted ads and content, usually without your knowledge or permission.
These advanced protection features prevent all apps and websites you visit on your device from communicating with the third-party companies in our open-source blocklists.
Advanced protection features are disabled by default. To enable them:
- Make sure you have disconnected from the VPN.
- Click

 > Preferences… > Advanced Protection.
 - Check or uncheck the boxes for the advanced protection features to suit your needs.


- Reconnect to the VPN to apply the changes.
Read more about ExpressVPN’s advanced protection features.
Need help? Contact the ExpressVPN Support Team for immediate assistance.
How to add shortcuts to the ExpressVPN app
The shortcuts feature appears on the ExpressVPN home screen after you connect to VPN. Shortcuts will not appear the first time you connect, but will appear starting from your second connection.
Shortcuts allow you to conveniently and quickly launch apps and websites from the ExpressVPN app anytime you are connected. If you find yourself regularly visiting a handful of favorite destinations after connecting to VPN—a particular streaming service or social network, for example—adding it as a shortcut saves you from needing to switch back to your device’s home screen or browser to find it each time.
To launch an app or website, click its icon.
If you have fewer than five shortcuts selected, you can add one by clicking ![]()
![]() on the main screen.
on the main screen.
Alternatively, you can add or remove shortcuts by clicking ![]()
![]() , then selecting Preferences… > Shortcuts.
, then selecting Preferences… > Shortcuts.
To add a shortcut, click ![]()
![]() .
.
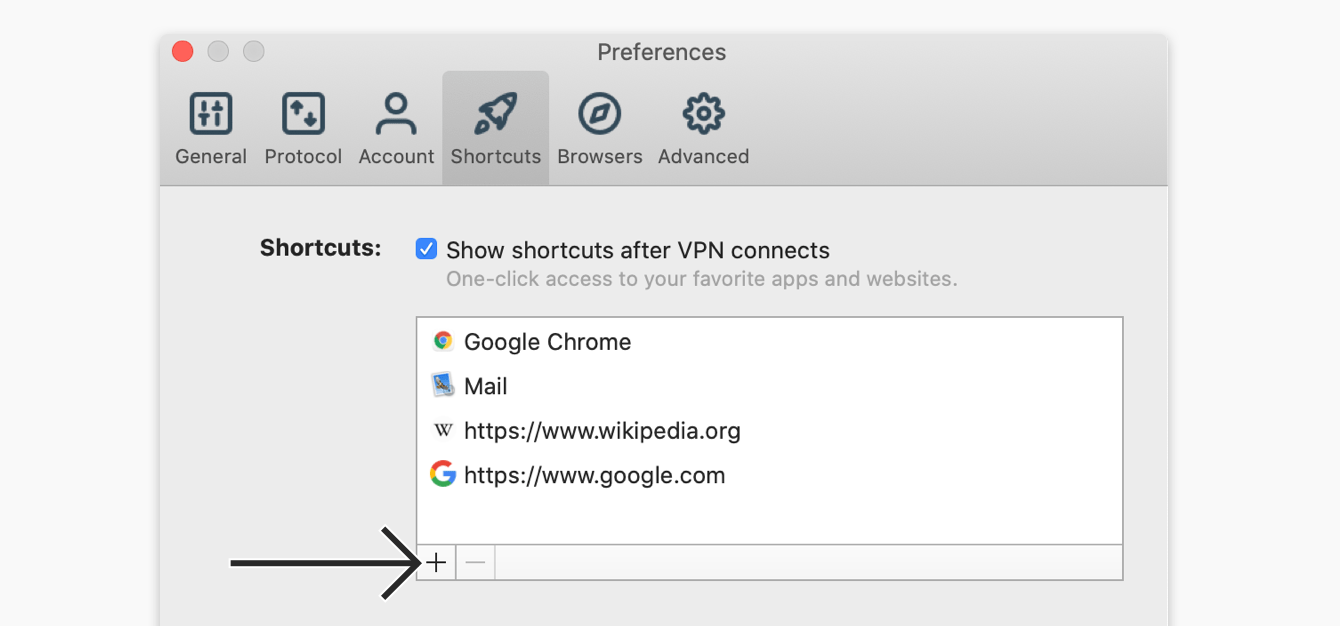
Then select Add app shortcut or Add website link to proceed.
To remove a shortcut, select the shortcut, then click ![]()
![]() .
.
Need help? Contact the ExpressVPN Support Team for immediate assistance.
Launch and connect ExpressVPN on startup
To launch and connect ExpressVPN when starting up your Mac:
- In the ExpressVPN app, click , then click Preferences… > General.
- Under Startup, check the boxes for launching ExpressVPN on startup and connecting to your last used VPN location.
Need help? Contact the ExpressVPN Support Team for immediate assistance.
Use the VPN Speed Test
To use the VPN Speed Test, you must be disconnected from the VPN.
Click ![]()
![]() , then click Speed Test.
, then click Speed Test.
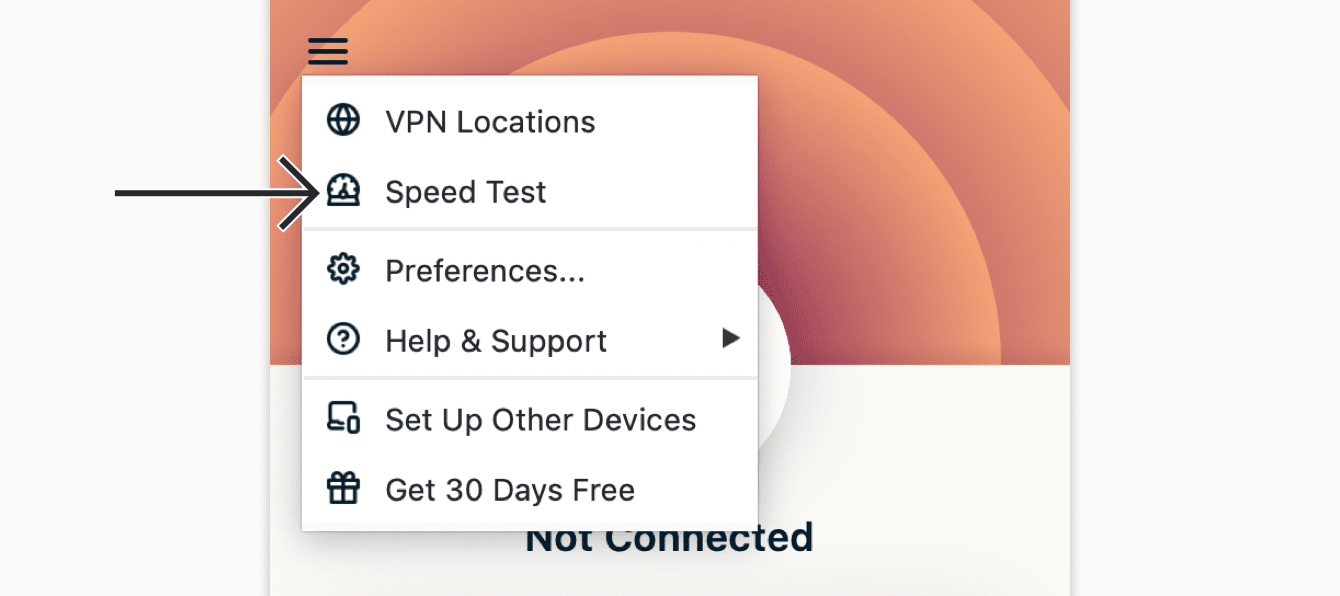
On the Speed Test screen, click Run Test. The test will take a few minutes to run.
After the test is finished, select the locations with HIGH Speed Index, LOW Latency, and HIGH Download Speed.
Need help? Contact the ExpressVPN Support Team for immediate assistance.
Use Split Tunneling
Split Tunneling lets you select which apps use the VPN when you are connected to ExpressVPN.
To change your split-tunneling settings, click ![]()
![]() and go to Preferences….
and go to Preferences….
Tick the box in the Split tunneling section and click Settings.
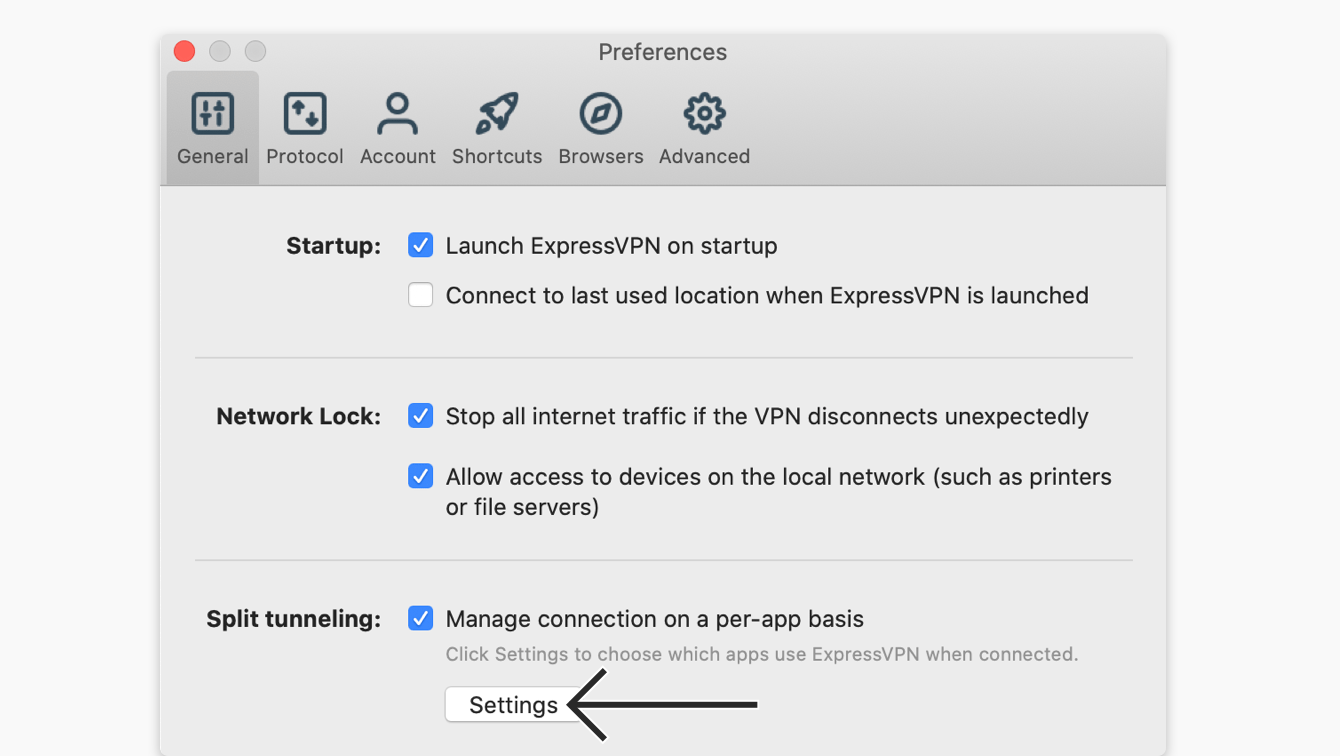
From there, you can select different split-tunneling options. Expand the list below to learn more about each option:
Selecting this option will make all of your apps use the VPN when you are connected to ExpressVPN.
In the Split Tunneling menu, select All apps use the VPN, then click OK.
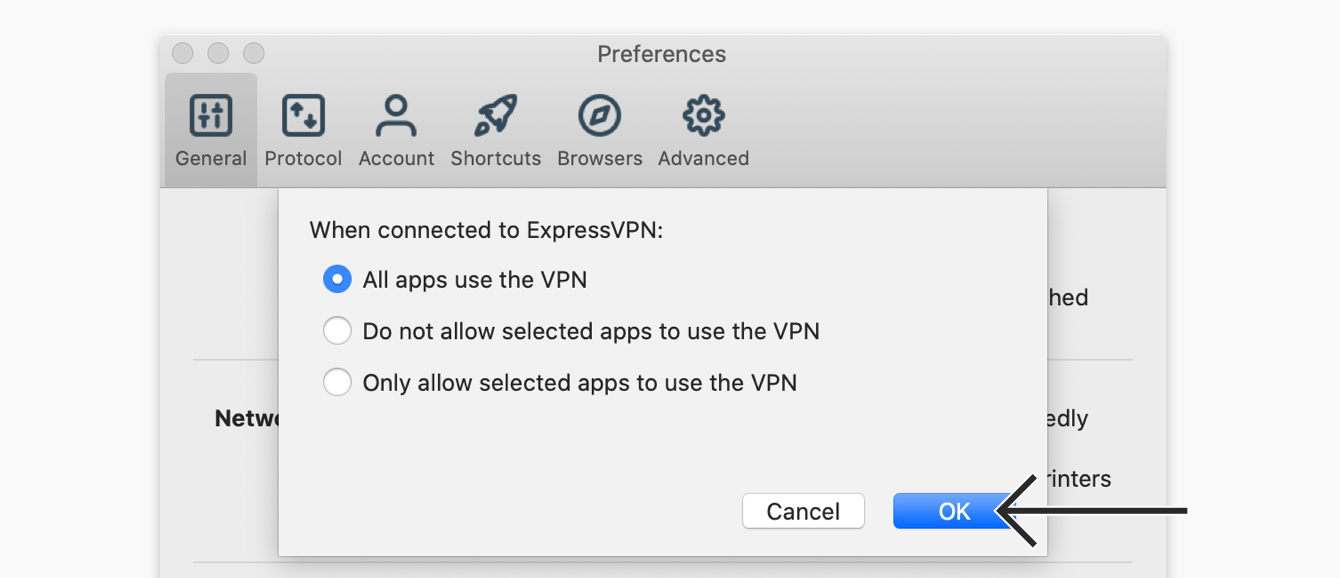
(Selecting this option is the same as unchecking the box for Split tunneling in the previous step.)
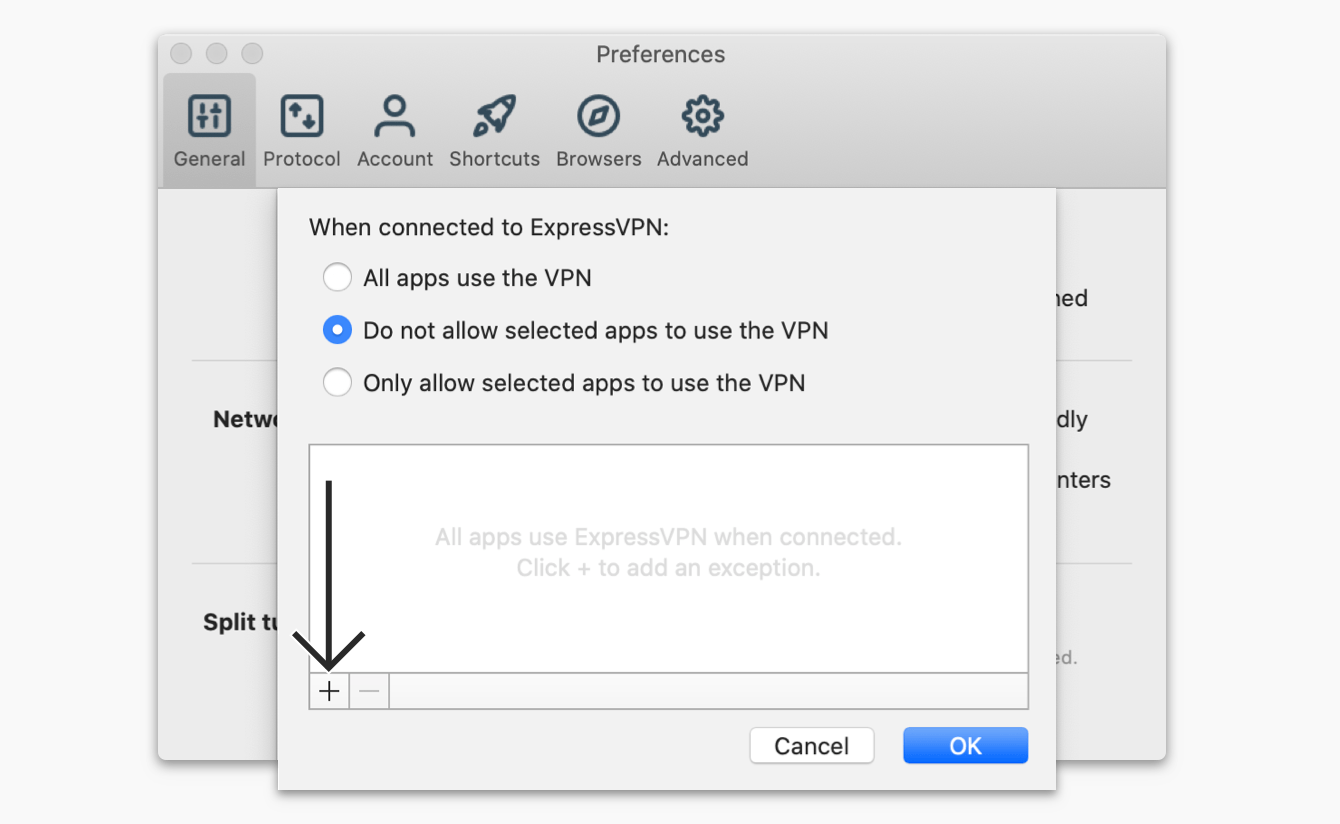
Do not allow selected apps to use the VPN
This option lets you set certain apps to not use the VPN when you are connected to ExpressVPN. To choose which apps will not use the VPN, select Do not allow selected apps to use the VPN, then click ![]()
![]() .
.
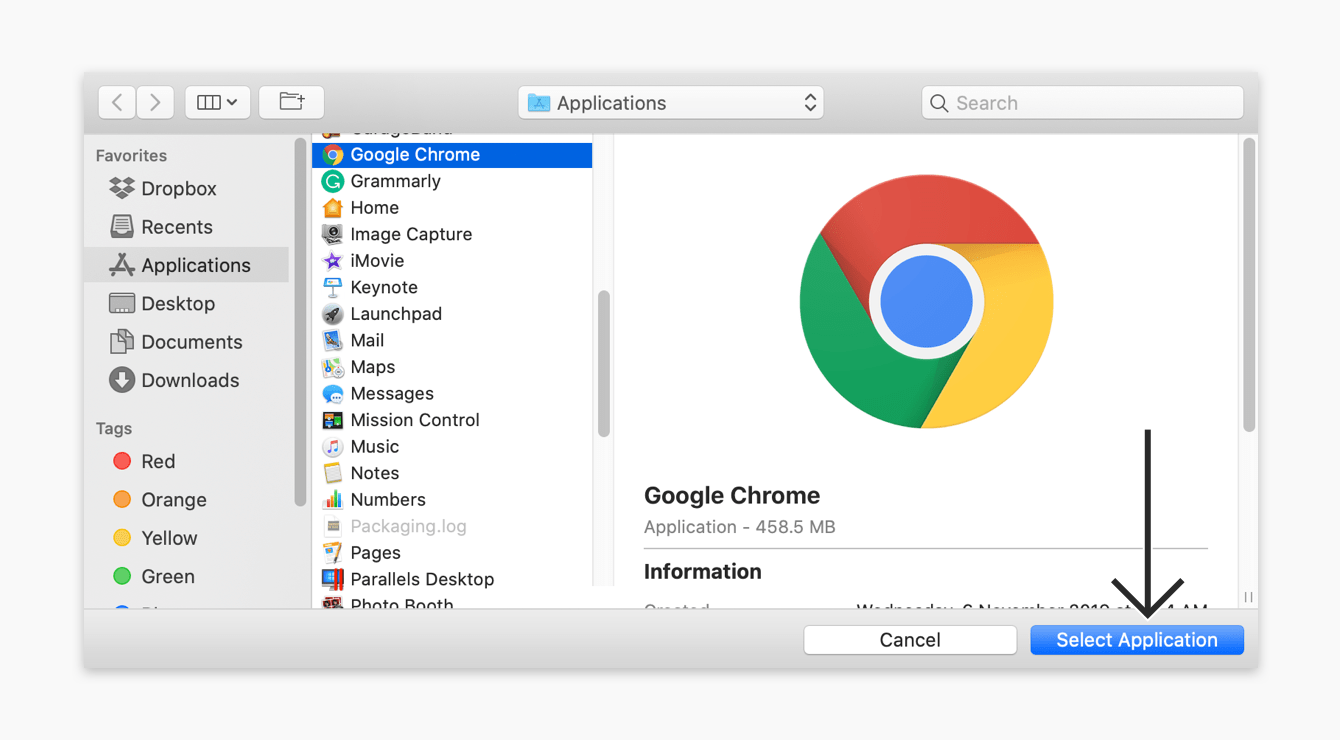
Check the box next to each app you want to exclude from the VPN, then click Select Application.
Click OK.
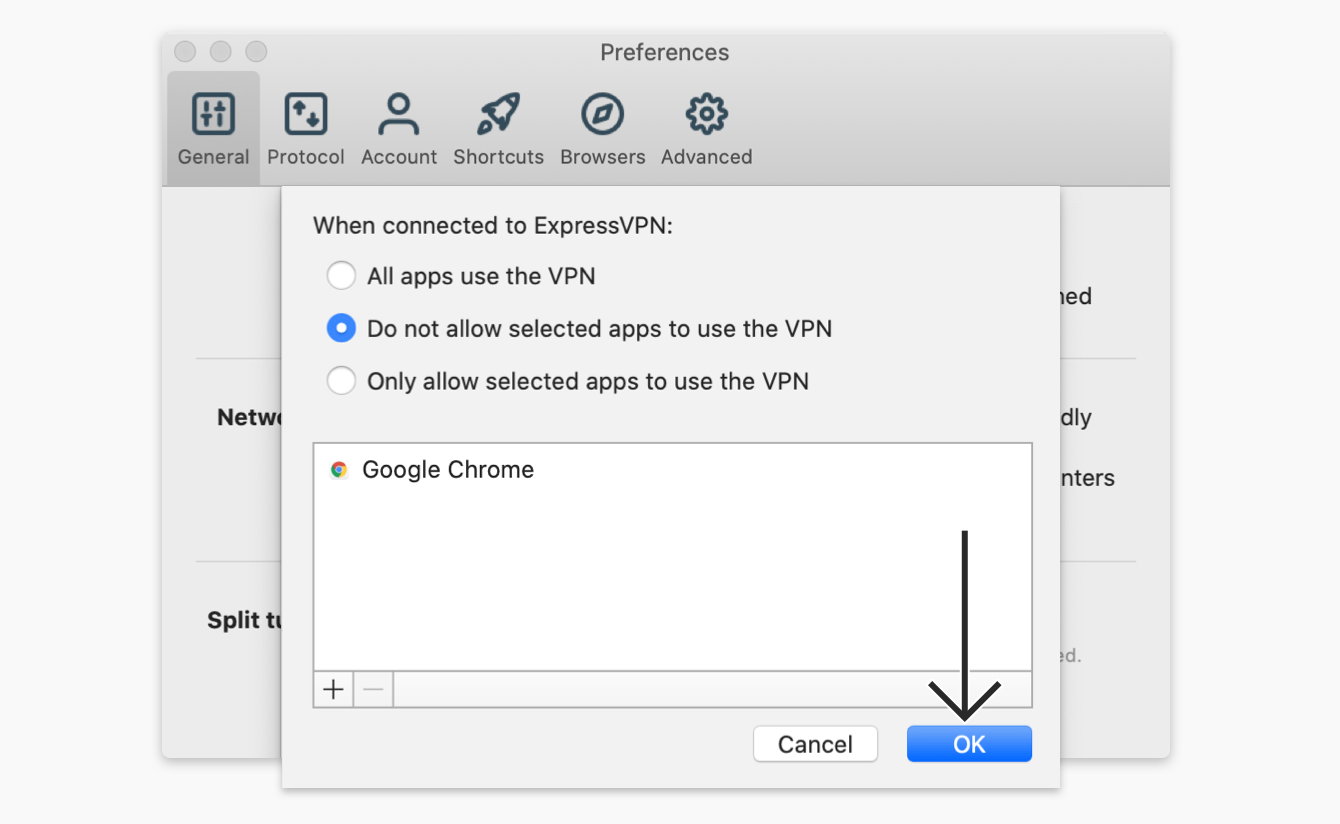
When you are connected to ExpressVPN, all internet traffic except for the selected app(s) will use the VPN.
Only allow selected apps to use the VPN
This option allows you to select certain apps to use the VPN.
To choose which apps will use the VPN, select Only allow selected apps to use the VPN, then click ![]()
![]() .
.
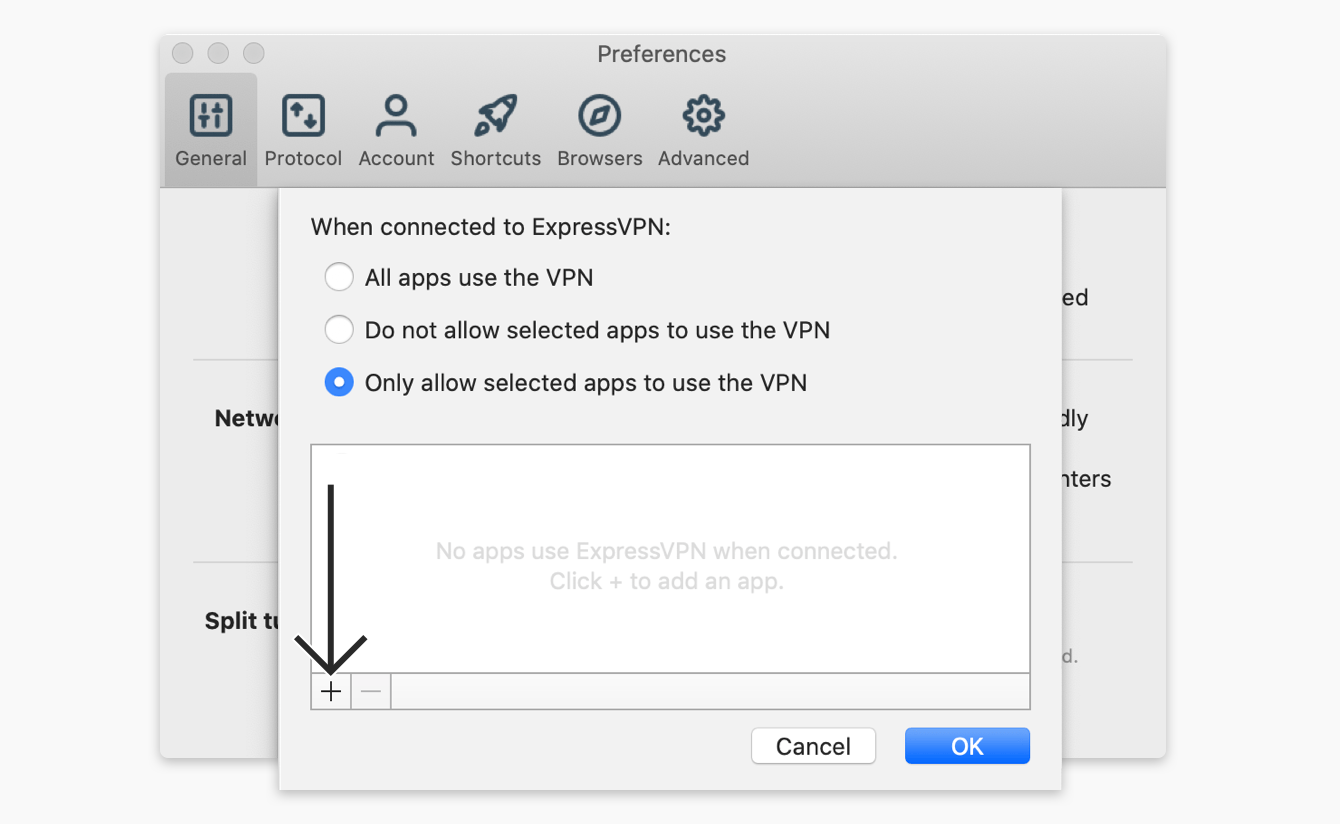
Check the box next to each app you want to protect with the VPN, then click Select Application.
Click OK.
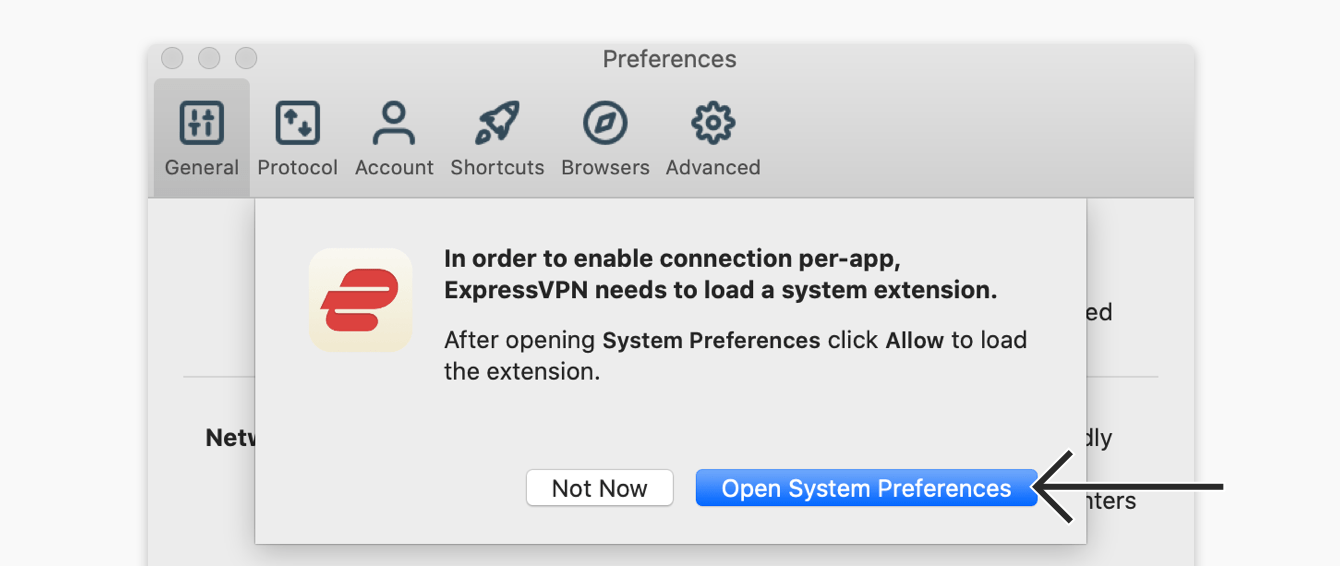
Enable Split Tunneling on your Mac
Follow the steps above in this section, but when prompted, click Open System Preferences.
You will see a notification for “System Extension Blocked.” Click OK.
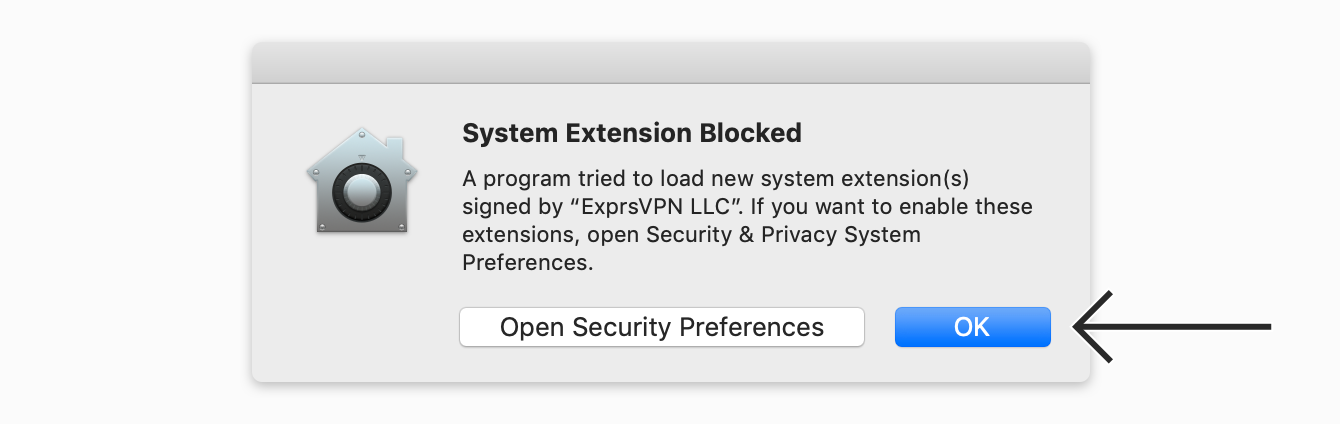
In System Preferences, click Allow next to System software from developer “ExprsVPN LLC” was blocked from loading. You may need to click ![]()
![]() and enter your password to make changes.
and enter your password to make changes.

You can now return to the ExpressVPN app and change the split-tunneling settings.
IN DEPTH: Learn more about the split-tunneling feature
Need help? Contact the ExpressVPN Support Team for immediate assistance.
Optional: Use the Menu Bar
If you do not want to operate ExpressVPN using the main app interface, you can use the Menu Bar instead. The ExpressVPN status menu is in the Mac menu bar at the top of your screen, and gives you access to almost all of the functions available in the main app window.
To operate the app from the Menu Bar: Click ![]()
![]() and then click Preferences….
and then click Preferences….
![]()
![]()
In the Advanced tab, select Menu Bar & Dock.

You can select whether to use ExpressVPN from both the Menu Bar and Dock, from the Menu Bar only, or the Dock only.
Need help? Contact the ExpressVPN Support Team for immediate assistance.
Use the ExpressVPN browser extension
From your app, click ![]()
![]() , select
, select ![]() Preferences…, then go to the Browsers tab. Click Get Browser Extension and follow the on-page instructions.
Preferences…, then go to the Browsers tab. Click Get Browser Extension and follow the on-page instructions.
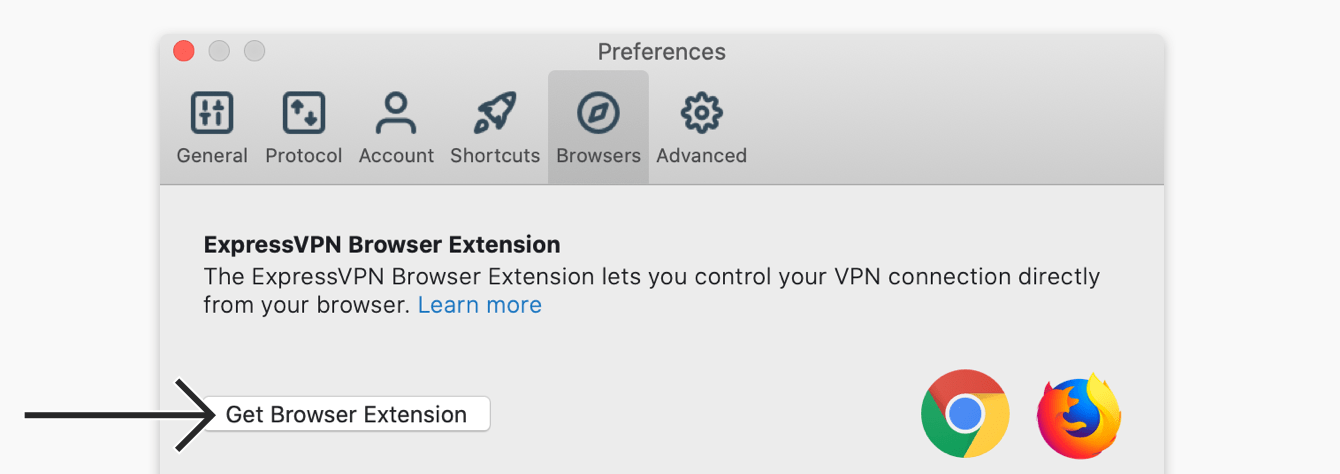
Learn more about the ExpressVPN browser extension here.
Need help? Contact the ExpressVPN Support Team for immediate assistance.
Access printer and shared folders on local area network
Some users may have problems accessing shared folders and printers on LAN while connected to the VPN.
Need help? Contact the ExpressVPN Support Team for immediate assistance.
Change languages in the ExpressVPN Mac app
If you are using macOS 10.15 or above, you can change the language of the ExpressVPN app.
Note: Older versions of macOS do not support this feature. If you want to use the ExpressVPN app in other languages, you can use the ExpressVPN browser extensions for Chrome, Firefox, and Edge.
On your Mac, go to System Preferences > Language & Region.
Click Apps. Then click ![]()
![]() .
.
For Application, select ExpressVPN. For languages, select your preferred language. Click Add.

You will be prompted to relaunch ExpressVPN. Click Relaunch now.
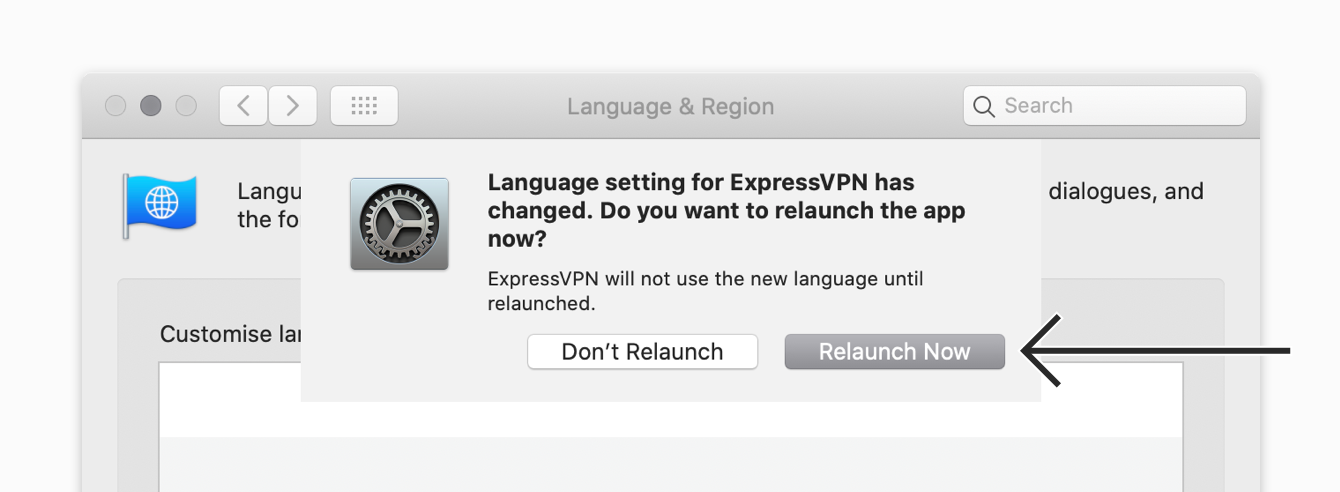
You can now use ExpressVPN in your preferred language.
Need help? Contact the ExpressVPN Support Team for immediate assistance.
Uninstall the app
To remove the app from your Mac computer, you must first close the app.
Open Terminal by going to Applications > Utilities > Terminal.
Run this command: /Applications/ExpressVPN.app/Contents/Resources/uninstall.tool
Type “yes” when asked, then enter your password to confirm you want to remove the app from your computer.
Close Terminal. ExpressVPN has been removed from your computer.

Need help? Contact the ExpressVPN Support Team for immediate assistance.